Navigating an airport layover with a disabled traveler requires careful preparation, operational awareness, and a strong understanding of how airports move people and equipment. When you apply practical layover accessibility tips, you strengthen your control over the connection and eliminate the uncertainty that frustrates travelers who rely on mobility support. Airports run on predictable internal cycles that include escort dispatch timing, elevator traffic patterns, device-handling workflows, and terminal-to-terminal routing. When you understand these patterns, you transform the layover into a managed transition rather than a stressful race between flights.
Layover Accessibility Tips #1: Pre-Trip Planning
Understanding the Physical Requirements of the Airport Connection
You always begin with an honest evaluation of the connecting airport’s physical layout. Many airports have long concourses, steep inclines, or shuttle and train transfers, so mobility-dependent travelers experience slower movement through these environments. Airlines calculate Minimum Connection Times using able-bodied walking speeds, which never reflect the true needs of someone who requires mobility support or escort assistance. When you replace those unrealistic assumptions with practical layover accessibility tips based on the airport’s actual terrain, you create a more stable and predictable connection.
Choosing Realistic Between-Flight Connection Times
You must choose connection times that match the traveler’s real movement speed. Domestic layovers usually require 90–120 minutes because escorts, elevators, and restroom stops lengthen the process. International connections benefit from at least 2.5–3 hours since passport control, re-screening, and new terminal transfers all add necessary time. When trains or buses link terminals, you should add 20–45 more minutes, and when mobility devices include detachable parts, you should add additional buffer time. These layover accessibility tips prevent panic and keep the connection smooth and controlled.
Layover Accessibility Tips #2: Mobility-Device Instruction Sheet
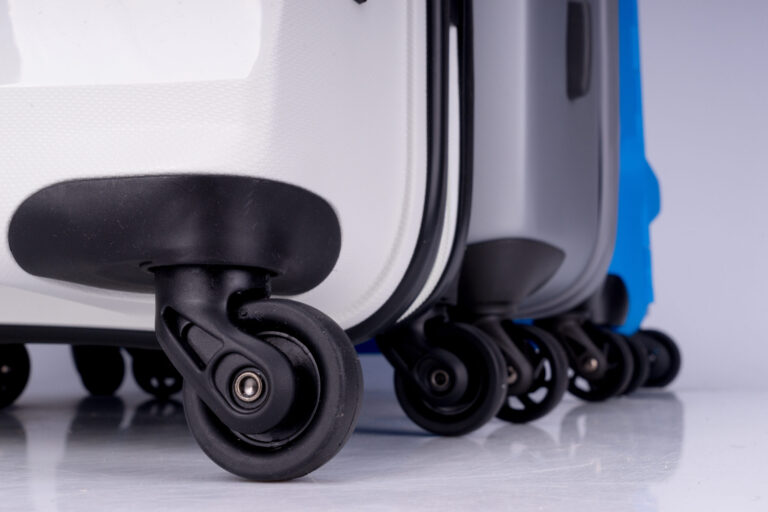
A mobility-device instruction sheet prevents misunderstandings that lead to equipment damage. Ramp crews handle countless device types during tight turnaround windows, so clear instructions help them operate and secure the device correctly. You make their job easier and protect the traveler’s independence when you include power steps, battery information, and lift-point labels. Additionally, a simple photo of the device in its fully assembled form eliminates confusion and reinforces the gate-return requirement.
- Power instructions guide ramp workers so they avoid incorrect shutdown methods. You protect the device’s electronics when you show the right power sequence. You reduce handling delays when ground staff understand the controls immediately. You also maintain the device’s long-term performance by preventing electrical strain or improper powering methods.
- Battery information helps handlers follow safety rules without guessing. You prevent dangerous mistakes when you clarify whether the battery must be removed or transported in a specific manner. You reduce operational delays because ramp staff can follow your instructions instead of searching for guidance. You also preserve the battery’s lifespan by avoiding rough handling or incorrect storage.
- Lift-point labels show handlers exactly where to grip the device. You protect the frame by preventing staff from lifting by fragile structural components. You also reduce the chance of bent brackets or cracked welds because handlers know the correct contact points. You maintain device stability for the traveler during the next stage of movement.
- A fully assembled device photo eliminates confusion when multiple teams handle the equipment. You help staff verify that all parts remain correctly attached before stowing it. You avoid miscommunication between gate agents and ramp workers because everyone references the same image. You also reinforce the expectation that the device returns to the jet bridge rather than baggage claim.
Managing Noise and Sensory Load During Long Layovers

Long layovers introduce constant ambient noise from aircraft, announcements, and crowded gate areas, which can increase fatigue for travelers with accessibility needs. In this Airport News Now Article, we examine Bluetooth noise cancelling headphones that help create quieter, more controlled environments during extended waits and multi-segment trips. The guide compares ANC performance, comfort, and battery life so travelers can choose headphones that reduce sensory overload without interfering with airport communications.
Layover Accessibility Tips #3: Understanding Your Rights
Verifying SSR Codes Before the Trip
You verify Special Service Request (SSR) codes at booking, 48 hours before departure, and again at check-in. These codes control how mobility services appear in the airline’s system, so each flight segment must include the correct entry. WCHR supports long-distance assistance, WCHS supports passengers who cannot use stairs, and WCHC supports travelers who require full assistance to their aircraft seat. When you confirm these codes early and often, you strengthen your layover accessibility tips and keep the mobility chain intact from start to finish.
Asking Airline Personnel Operational Questions
You ask operational questions rather than general ones because clear details help you build an accurate connection plan. You ask whether the layover requires TSA re-screening because this step adds time. You ask whether terminals connect by train or shuttle because mobility devices move slower across multi-modal transfers. You also ask which contractor provides mobility services at the connecting airport because contractors follow different dispatch systems, which affect timing.
Airport Damaged Your Mobility Device?
Has the airport or airlines damaged your mobility device during a layover? Be sure to understand your rights. In this article we provide a summary of your rights, with outlinks for further information.
Layover Accessibility Tips #4: Arrival and Deplaning
What Happens Between Landing and Escort Arrival
Understand the sequence that follows landing so you avoid frustration. The aircraft parks first, the jet bridge attaches next, the cabin door opens, and the ramp crew retrieves mobility devices afterward. Escorts wait until the aisle clears enough for safe aisle-chair positioning, so their arrival always follows the aircraft’s internal clearing sequence. When you plan around this predictable pattern, you maintain realistic expectations and support a calmer transition.
Inspecting the Device at the Jet Bridge
Inspect the device immediately because the jet bridge provides the strongest location for accountability. Check alignment, rolling resistance, joystick responsiveness, and battery security to identify any damage right away. When you report issues at the jet bridge, you strengthen your claim because staff can verify the device’s condition in real time. These layover accessibility tips protect the traveler and prevent long-term equipment issues.
Layover Accessibility Tips #5: Navigating the Terminal
Choosing Routes Based on Mobility Needs
Choose routes designed for consistent movement rather than minimum distance. Escorts prefer wide corridors because they avoid bottlenecks, sharp turns, and sudden crowding. These routes provide smoother pacing that supports both the escort and the traveler, especially when the mobility device requires extra space. When you follow this strategy, you create a more predictable and comfortable layover.
Using Elevators Strategically During Layovers
You improve your timing when you understand the difference between primary and secondary elevators. Primary elevators serve the largest passenger volume and slow dramatically during boarding waves. Meanwhile, secondary elevators near quieter endcaps maintain steadier movement because fewer passengers use them. When you rely on these layover accessibility tips, you prevent delays and keep the connection stable.
Setting a Movement Plan with the Escort
Tell the escort your pacing needs, restroom plans, and comfort requirements before movement begins. Escorts choose better routes when they understand these factors early. You avoid rushed transitions because everyone agrees on the plan. This communication strengthens layover accessibility tips by aligning expectations between the escort and the traveler.
Layover Accessibility Tips #6: Using Gate-Agent Priority Rights
Right to Immediate Assistance
You step to the front of the line for mobility-related needs because the Air Carrier Access Act guarantees this right. You coordinate aisle-chair timing, confirm preboarding, and verify gate-return without waiting behind general passengers. This direct access improves the entire connection by removing unnecessary delays. When you exercise these rights confidently, you prevent misunderstandings that disrupt the layover.
Using Direct, Operational Phrasing
Use clear, operational language because it triggers faster responses from airline staff. Statements such as “We need to confirm gate-return for our mobility device” communicate urgency and precision. You avoid misinterpretation because these phrases describe the exact task. This communication method strengthens layover accessibility tips by keeping the process straightforward.
Requesting the CRO
You request the Complaint Resolution Official (CRO) when staff cannot resolve an accessibility issue. CROs hold legal authority to correct problems on the spot, so involving them often results in immediate solutions. You protect the traveler’s rights when you escalate appropriately. This remains one of the most powerful layover accessibility tips because it removes unnecessary obstacles.
Layover Accessibility Tips #7: Restrooms, Seating, and Quiet Areas
Companion-Care Restrooms
Choose companion-care restrooms because they provide space for transfers, medical routines, and equipment adjustments. These rooms offer a safer environment than crowded standard stalls, especially when mobility devices require extra maneuvering space. You reduce stress when you plan these restroom visits early. This strategy improves comfort and keeps the layover running smoothly.
Selecting Efficient Seating
Select seating near elevators, restrooms, and FIDS boards to minimize unnecessary movement during the layover. This placement reduces backtracking and keeps essential services easily accessible. You maintain better timing because everything remains within reach. This is one of the most reliable layover accessibility tips for preserving energy and reducing stress.
Using Sensory Rooms
Make use of sensory rooms during longer layovers because they provide quiet, low-light environments that support travelers with sensory sensitivities. These spaces offer a calm reset between flights and reduce overstimulation from busy terminals. You maintain emotional stability for the traveler when you use these controlled environments. This approach strengthens the overall comfort of the journey.
Layover Accessibility Tips #8: Managing Gate Changes
Why Gate Assignments Shift
Expect gate changes because they occur for predictable operational reasons such as aircraft swaps, late arrivals, or crew adjustments. These changes do not relate to the traveler’s mobility requests. When you monitor FIDS boards often, you stay ahead of these shifts and adjust your route quickly. You maintain control over the layover because you prepare for these transitions early.
Layover Accessibility Tips #9: Boarding the Next Flight
Confirming Gate-Return Before Boarding
Verify gate-return before boarding because this prevents the mobility device from going to baggage claim. Check the gate-delivery tag, confirm the entry in the reservation, and speak with the ramp team to ensure they understand the instructions. This three-step process eliminates the most common mobility-handling mistake. These layover accessibility tips help keep the device available at the next jet bridge.
Handling Removable Components
Remove joysticks, cushions, leg rests, and any detachable parts and bring them into the cabin. These items remain safer with you because cargo areas involve fast movement, low visibility, and high stacking pressure. You protect these sensitive components by controlling them directly. This practice prevents damage and improves consistency during the next flight.
Using Preboarding
Always use preboarding because it provides time, space, and a clear aisle for safe transfers. You reduce pressure when you board without a crowd behind you. You manage equipment and seating at a comfortable pace. This remains one of the most reliable layover accessibility tips for improving safety and comfort.
Layover Accessibility Tips #10: Managing Longer International Connections
Why Longer Buffers Support Accessibility
Select longer buffers for international connections because passport control, customs, and re-screening introduce unavoidable delays. Train transfers and random inspections add more time, so you protect the layover by scheduling a wide margin. You reduce stress when delays occur because the extra time absorbs them. These layover accessibility tips ensure a more predictable experience abroad.
Quick-Reference Checklist for Layover Accessibility Tips
Before Departure
- Verify SSR codes for every segment because missing entries disrupt mobility coordination. Confirm them multiple times to avoid errors. This helps support consistency across the entire trip when you verify these codes early. By following these steps you set the foundation for smooth assistance throughout the itinerary.
- Attach a mobility-device instruction sheet because it guides ramp crews clearly. Clarify power steps, lift points, and battery rules before anyone handles the device. This step allows you to reduce the chance of equipment damage by eliminating guesswork.
- Review terminal maps with a focus on elevators, restrooms, and connection routes. Prepare mentally for the physical layout before you arrive. Thus, you reduce the risk of confusion under time pressure. You also improve escort communication because you already understand the airport structure.
After Landing
- Wait with patience for the escort because their arrival depends on aisle clearance and cabin sequence. Avoid rushing and maintain safety during this structured process. You support mobility teams by aligning your expectations with their workflow. Thereby creating a smoother transition from aircraft to terminal.
- Inspect the mobility device immediately to detect damage early. Test alignment, rolling resistance, and battery security. Report issues before leaving the jet bridge to ensure accountability. By doing so, you protect long-term performance by addressing problems right away.
- Confirm your route to the next gate and adjust quickly if needed. Communicate with the escort to review elevator and restroom locations. Thus, you maintain efficient timing when you plan routes early, eliminating uncertainty during the layover.
During the Layover
- Select seating near essential access points to reduce unnecessary movement. Stay close to elevators, restrooms, and FIDS boards to support timing and comfort. As such, you prevent backtracking by choosing strategic locations and preserve energy for the traveler by keeping everything close.
- Monitor gate changes frequently because they occur without warning. Adjust your route to match the new location quickly. Prepare your layover by evaluating elevator and restroom access at the updated gate. Maintain control by staying flexible.
Before Boarding
- Reconfirm gate-return because mistakes at this stage create major disruptions. Start out by checking tags, reservation notes, and ramp team awareness. You eliminate the chance of misrouting by verifying all three points and support smoother deplaning at the next airport.
- Secure all removable mobility components and carry them onboard. Protect these pieces from damage in the cargo hold. In the meantime, you maintain full function of the device for the next connection. You also avoid unnecessary replacements and repairs.
Final Thoughts
A successful airport layover for a traveler with mobility needs requires realistic planning, strong communication, and consistent use of layover accessibility tips that reflect real airport operations. When you align your strategy with escort dispatch timing, terminal routing, elevator traffic, and mobility-device handling procedures, the entire experience becomes predictable and controlled. You protect the traveler’s safety, preserve the device’s condition, and create a calm, structured journey. Instead of interpreting the layover as an unpredictable gap between flights, you transform it into a coordinated sequence that supports stability at every step of travel.